How to Buy BMIC with a Card on Desktop
If you prefer to purchase BMIC using a debit or credit card, you can do so directly through the official presale platform. The process is simple and secure, and your BMIC allocation will still be linked to your connected ERC-20 wallet for claiming at TGE.
You must still connect an ERC-20 compatible wallet first, as this wallet will receive your allocation and allow you to claim your tokens later.
Don’t Have an ERC-20 Wallet? Start Here
Before purchasing BMIC, you must have an ERC-20 compatible wallet connected to the Ethereum network.
Step 1: Set Up a Web3 Wallet
Download and install a decentralized Web3 wallet that supports ERC-20 tokens. Popular options include MetaMask (browser extension & mobile) and Trust Wallet (mobile wallet).
Once installed:
-
Create a new wallet or import an existing one
-
Safely store your recovery phrase offline
-
Set a strong password
-
Enable PIN protection
-
Activate Two-Factor Authentication (2FA) or biometric security if supported
Never share your private key or recovery phrase with anyone.
Step 2: Add ETH to Your Wallet
The BMIC presale runs on the Ethereum network, which means you must hold ETH to cover network transaction (gas) fees.
Although BMIC can be purchased using ETH, USDT, or USDC, you will still need some ETH in your wallet to pay gas fees for on-chain transactions.
You can fund your wallet by:
-
Buying ETH on a centralized exchange such as Coinbase or Binance and transferring it to your wallet
-
Using your wallet’s built-in fiat on-ramp feature to purchase ETH directly
Once your wallet is funded, you’re ready to proceed.
Already Have an Ethereum Wallet? Follow These Steps
If you already have an ERC-20 wallet, follow these steps to buy BMIC on desktop.
Step 1: Connect Your ERC-20 Wallet
Visit the official BMIC presale website on your desktop browser and click the “Connect Wallet” button at the top right of the page.

Select your preferred wallet (such as MetaMask or WalletConnect) and approve the connection inside your wallet.
Your connected wallet will be used to receive and claim your BMIC tokens.
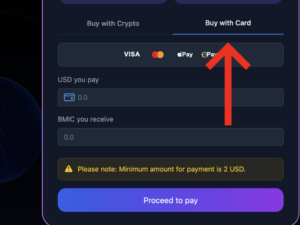
Step 3: Select “Pay with Card”
Choose the “Pay with Card” option instead of ETH, USDT, USDC, or other cryptocurrencies.
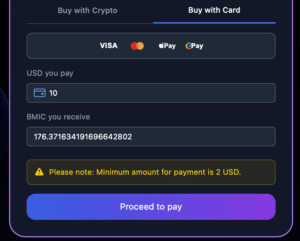
Step 4: Enter the Amount in USD
Select the amount in USD that you would like to use to purchase BMIC tokens.
The platform will automatically calculate the equivalent amount of BMIC you will receive. Click proceed to pay.
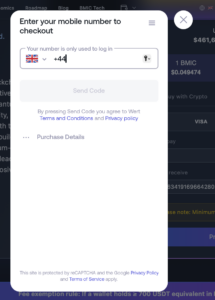
Step 5: Verify Your Phone Number
Enter your phone number to receive a verification code via SMS.
Input the code you receive to confirm your identity and continue the payment process.
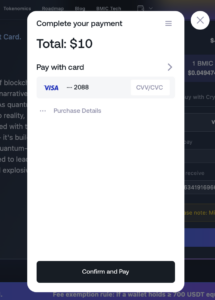
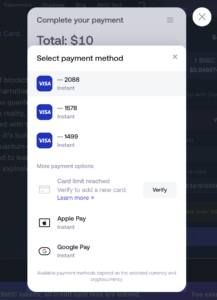
Step 6: Enter Payment Details
Add the debit or credit card you wish to use for the purchase.
Alternatively, you may select Google Pay or Apple Pay if available.
Review the transaction details and proceed with the payment.
Your BMIC allocation will appear on your dashboard
After the transaction is confirmed on the Ethereum network you can see it if you click here:

What Happens After Purchase?
After the transaction is confirmed on the Ethereum network:
-
Your BMIC allocation will appear on your dashboard
-
You will be able to claim your tokens at the Token Generation Event (TGE)
-
The official TGE date will be announced by the team
Always ensure you are on the official BMIC website before connecting your wallet. https://bmic.ai/